Flexonic Drive Belt Installation
Apr 01, 2020
Here are the steps on how to install a new Flexonic drive belt on Matrix T3x, T3x-06, T3xi-06, and T3xi-AC model treadmills.
PROCEDURE:
- Remove the 4 screws holding on the motor cover and remove it.
- Disconnect the spring from the tension wheel set and remove the spring. The spring can be discarded, it will not be re-used.
- Remove the top plate of the tension wheel set.
- Remove the tension wheel set.
- Remove the 2 screws holding the front roller in place.
- Lift up the drive belt side of the front roller and remove the existing drive belt.
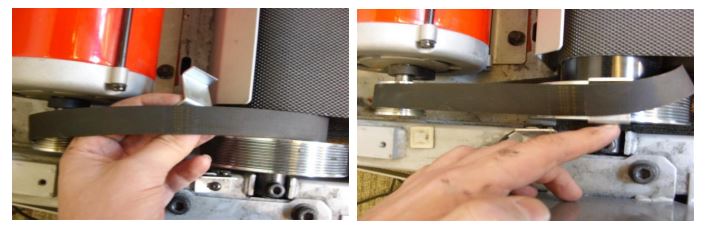
- Install the Flexonic belt so that it travels around the motor pulley, but inside of the pulley on the front roller.
- Reattach the front roller to the frame using the 2 screws removed in Step 5.
- Use the Belt Installation Tool to install the belt on the front roller pulley
- Move the belt in both directions for several revolutions so that the belt can settle into position.
- The Flexonic drive belt is now set, the tension wheel set including the spring is discarded and not re-installed on the treadmill.
- Re-install the motor cover.
There's a great youtube video here, it's a bike application but a flexonic belt install is a flexonic belt install... Go about a minute and 30 secons in.
Check it here for reference:
http://productload.johnsonfit.com/inc/uploaded_media/fa29c186a2be7fae9abac35df4f40bce/image/221dd1ba55f840585444387cc9ff2236.pdf