Search Part Name & Description
Gathering Results: Please be patient
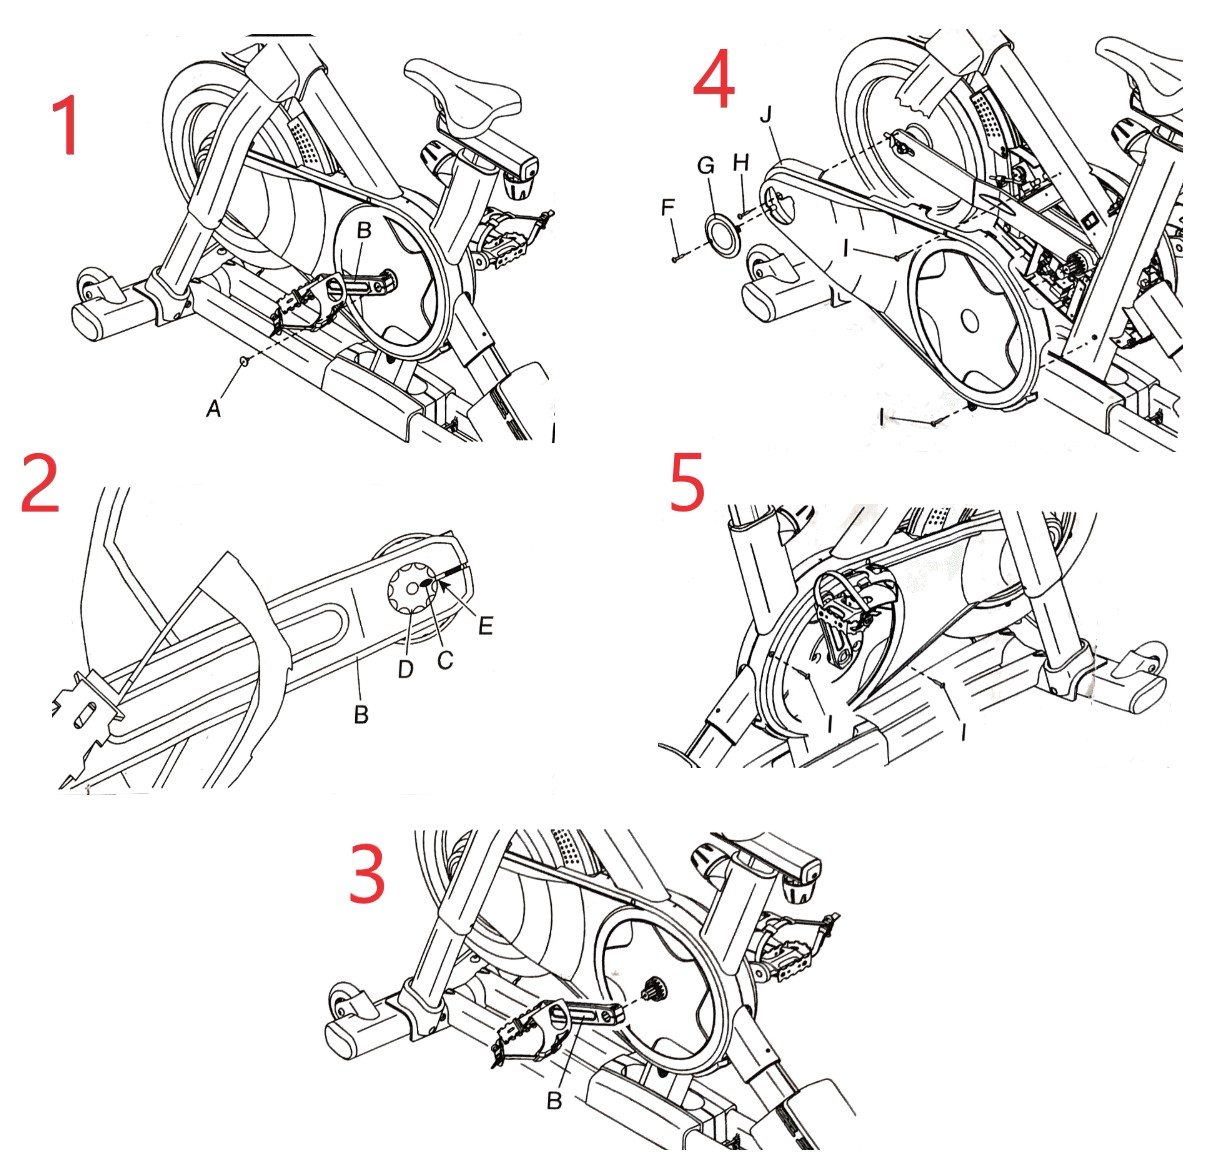
Read these instructions completely before you begin. Your studio cycle may look different from the studio cycle shown in the drawings. This procedure requires two persons and the following tools: A Phillips screwdriver, a marking pen, two adjustable wrenches, and a rubber mallet.
1. WARNING: Press the power switch off and unplug the power cord before you begin. Electric shock and injury may occur if the power cord is connected to an electrical outlet.
Press the power switch off and unplug the power cord.
See the upper drawing (Refer to Photo #1) . Remove the Crank Screw (A) from the left Crank Arm (B). Save the Crank Screw.
See the lower drawing (Refer to Photo #2) . Place a mark (C) on the end of the Crank (D) next to the notch (E) in the Left Crank Arm (B) to note the position of the Left Crank Arm for when you reassemble the studio cycle.
2. Remove the Left Crank Arm (B). Save the Left Crank Arm. (Refer to Photo #3)
3. Remove the Shield Cover Screw (F), and then remove the Shield Cover (G). Next, remove the five Shield Screws (H, I), and then remove the Left Shield (J); make sure to note the location of each size of Shield Screw. Save all these parts. (Refer to Photo #4&5)
6114 Madison Ct.
Morton Grove, IL 60053
847-309-2818


Hydra Fitness Exchange © 2025. All Rights Reserved.