Search Part Name & Description
Gathering Results: Please be patient
WARNING: Remove the key from the console and unplug the power cord before beginning. Electric shock and injury may occur if the power cord is connected to an electrical outlet. Read these instructions completely before beginning.
1. Slide the right cushion adjuster to the center of the right foot rail. Remove the foot rail screws. Then, carefully lift the right foot rail off the treadmill.
Repeat this step for the left foot rail.
2. Remove the rear roller bolts and lock washers. Count the number of turns needed to remove each rear roller bolt and write it here: Left______ Right________.
Remove the rear roller.
See the inset drawing when reassembling the treadmill. Make sure that the beveled hole in the axle of the rear roller is facing away from the walking platform.
3. Remove the indicated front platform screw, rear platform bolt, and platform nut. Repeat this procedure on the left side of the treadmill.
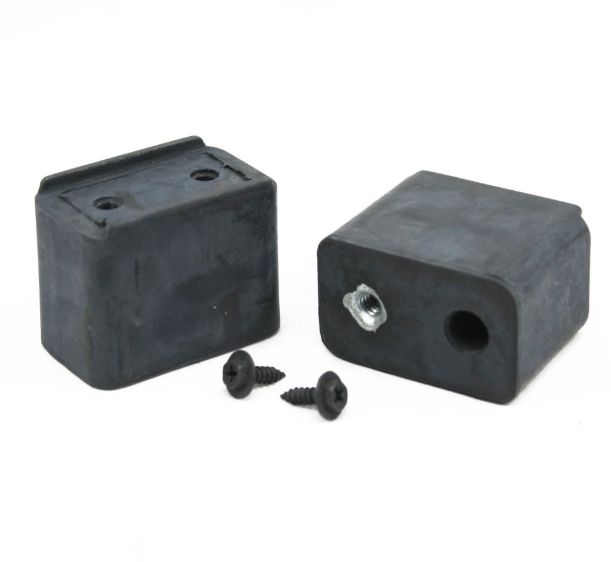
Carefully move the walking platform several inches upwards and toward the left side of the treadmill. Be careful not to tear the walking belt. Next, remove the indicated isolator screw and the right isolator. Attach a new isolator with a new isolator screw.
Repeat this procedure for the left isolator.
4. Reverse steps 3 to 1 and reassemble the treadmill.
6114 Madison Ct.
Morton Grove, IL 60053
847-309-2818


Hydra Fitness Exchange © 2025. All Rights Reserved.