Search Part Name & Description
Gathering Results: Please be patient

BLOG Details
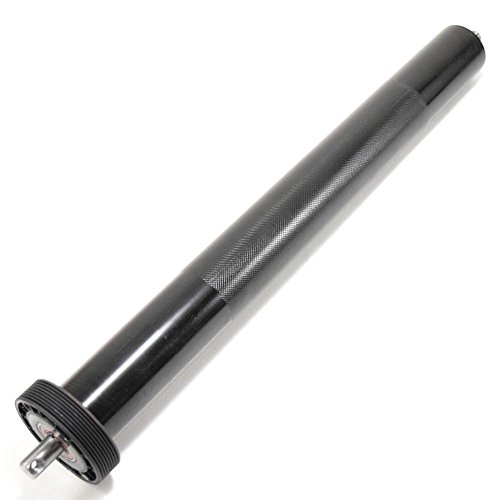
Replacing the Front Roller Or Drive Belt
May 28, 2020
![]()
![]()
Warning: Remove the key from the console and unplug the power cord before beginning. Electric shock and injury may occur if the power cord is connected to an electrical outlet. Read these instructions completely before beginning.
1. Remove the motor hood. Loosen the rear roller ajustment bolts until the walking belt can be easily moved from side to side on the rear roller and the front roller. Note the umber of turns each bolt was loosened. Right_____ Left ______
2. Loosen but do not remove the tension nut. Remove the drive belt from the motor. Remove the front roller adjustment bolt. Write the number of turns needed to remove the adjustment bolt here _______.
Note: Your treadmill may not have a front roller adjustment bolt.
Slide the front roller to the right until the left side is free of the lift frame. Lift the left side of the front roller. Remove the front roller and the drive belt.
If you are replacing the drive belt, discard the old one. If you are replacing the front roller, discard the old one. Slide the drive belt onto the front roller.
Reverse this step to secure the front roller with the adjustment bolt (if applicable) and slide the drive belt onto the motor. Do not tighten the tension nut yet.
3. Make sure the walking belt is centered on the front and rear rollers. Tighten the rear roller adjustment bolts the number of turns noted in step 1.
4. You now need to tighten the drive belt. Sit on the walking belt, and place your feet against the motor. Push on the motor to put tension on the drive belt. Have a second person twist the drive belt. When the drive belt can be twisted only 1/4 of a turn, firmly tighten the tension nut.
Plug in the power cord and insert the key. Stand on the foot rails and press a speed button on the console. Begin walking or running at a comfortable speed. If the drive belt slips or makes a high-pitched noise, the drive belt will need to be tightened. Unplug the power cord and remove the key.
Sit on the walking belt and place your feet against the motor. Hold the motor in osition with your feet and have a second person loosen the tension nut. Push on the motor with your feet to put more tension on the drive belt. Tighten the tension nut.
Repeat this step until the drive belt no longer slips or makes a high-pitched noise. Reattach the motor hood.
5. If the walking belt slips when walken on, UNPLUG THE POWER CORD and remove the key.
6. If the walking belt is off-center, UNPLUG THE POWER CORD and remove the key. If the walking belt has shifted to the left, use the allen wrench to turn the left rear roller adjustment bolt clockwise 1/2 of a turn; if the walking belt has shifted to the right, turn the bolt counterclockwise 1/2 of a turn. Be careful not to overtighten the walking belt. Plug in the power cord, insert the key, and walk on the treadmill for a few minutes. Repeat until the walking belt is centered.
Related:
How to tighten or adjust a walking belt.
- SHARE
-

-


Address
6114 Madison Ct.
Morton Grove, IL 60053
847-309-2818


Hydra Fitness Exchange © 2024. All Rights Reserved.
